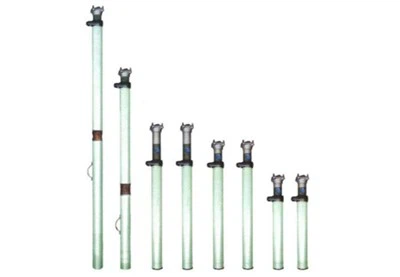

Hey there! As a supplier of cross roof beams, I've seen firsthand how crucial it is to get the height of these beams just right. Whether you're working on a mining project or any other construction job that requires cross roof beams, adjusting their height can be a game - changer. In this blog, I'll share some tips on how to adjust the height of a cross roof beam.


Why Adjusting the Height Matters
First off, let's talk about why adjusting the height of a cross roof beam is so important. A well - adjusted cross roof beam provides better support for the structure above it. In a mining setting, for example, proper beam height can prevent roof collapses, ensuring the safety of workers. In other construction projects, it can enhance the overall stability and durability of the building.
Tools You'll Need
Before you start adjusting the height of a cross roof beam, you'll need to gather the right tools. Here's a basic list:
- Level: This is essential for making sure the beam is perfectly horizontal once you've adjusted its height. A spirit level or a laser level can do the job.
- Jack: A hydraulic jack or a screw jack can be used to lift the beam to the desired height. Make sure the jack has enough capacity to handle the weight of the beam.
- Measuring Tape: You'll need to measure the current height of the beam and the amount you need to adjust it. A good - quality measuring tape will give you accurate readings.
- Wrenches and Screwdrivers: Depending on the type of connections used for the beam, you may need wrenches or screwdrivers to loosen or tighten bolts and screws.
Step - by - Step Guide to Adjusting the Height
Step 1: Assess the Situation
Before you start making any adjustments, take a good look at the cross roof beam. Check for any signs of damage or wear. Make sure you understand the structure it's supporting and any potential load requirements. If you're working in a mining project, you can refer to the Cross Roof Beam For Mining page on our website for more information about the specific beams used in such environments.
Step 2: Prepare the Work Area
Clear the area around the beam of any debris or obstacles. Make sure the ground or surface where the jack will be placed is stable and level. This will prevent the jack from tipping over during the adjustment process.
Step 3: Loosen the Connections
Use the appropriate wrenches or screwdrivers to loosen the bolts or screws that are holding the beam in place. Be careful not to remove them completely, as you'll need to re - tighten them later. This step allows the beam to move freely when you start adjusting its height.
Step 4: Position the Jack
Place the jack under the beam at a suitable location. Make sure the jack is centered and in contact with the beam evenly. If the beam is long, you may need to use multiple jacks to distribute the weight evenly.
Step 5: Lift the Beam
Slowly start lifting the beam using the jack. Keep an eye on the level to ensure that the beam remains horizontal as you lift it. Make small adjustments at a time and check the height regularly with the measuring tape. If you're using a DFB Metal Long Beam, which is a popular choice for many construction projects, be extra careful during the lifting process due to its length.
Step 6: Make Fine Adjustments
Once you've lifted the beam close to the desired height, use the level to make any fine adjustments. You may need to lower or raise the beam slightly to get it perfectly horizontal. This step is crucial for ensuring the proper support of the structure.
Step 7: Re - tighten the Connections
Once the beam is at the correct height and level, use the wrenches or screwdrivers to re - tighten the bolts or screws. Make sure they are tightened securely to prevent the beam from moving or shifting.
Step 8: Double - Check
After re - tightening the connections, double - check the height and level of the beam one more time. This will give you peace of mind that the adjustment was done correctly.
Special Considerations for Different Types of Cross Roof Beams
Hinged Top Beams
If you're working with a Hinged Top Beam, there are some additional considerations. The hinge allows for some flexibility in the beam's movement, which can be both an advantage and a challenge when adjusting the height. Make sure to support the hinge properly during the adjustment process to prevent any damage. You may also need to adjust the angle of the hinge slightly to ensure the beam is in the correct position.
Troubleshooting
Sometimes, you may encounter problems during the height adjustment process. Here are some common issues and how to solve them:
- Jack Slipping: If the jack starts to slip, check the surface where it's placed. It may be too smooth or uneven. You can place a piece of wood or a rubber mat under the jack to increase friction.
- Beam Not Lifting Evenly: This could be due to an uneven load distribution or a problem with the jack. Check the position of the jack and make sure it's centered under the beam. If necessary, use multiple jacks to distribute the weight evenly.
- Difficulty Re - tightening Connections: If the bolts or screws are difficult to re - tighten, they may be stripped or damaged. In this case, you may need to replace them with new ones.
Conclusion
Adjusting the height of a cross roof beam is a task that requires careful planning and the right tools. By following the steps outlined in this blog, you can ensure that your cross roof beam is adjusted to the correct height, providing optimal support for your structure. Whether you're in the mining industry or any other construction field, getting the height right is essential for safety and stability.
If you're in the market for high - quality cross roof beams, we're here to help. We offer a wide range of cross roof beams, including Cross Roof Beam For Mining, DFB Metal Long Beam, and Hinged Top Beam. Contact us to discuss your specific requirements and start a procurement negotiation. We're committed to providing you with the best products and services.
References
- Construction Safety Manual for Cross Roof Beams
- Mining Engineering Handbook